 Signs are effective messaging tools that improve a business’ performance. They also convey important information and guide customers to various parts of a premises.
This full-service signage shop specializes in commercial production and installation of indoor signs, graphics, vehicle wraps and more. Their customer-centric approach is backed by years of experience and consistent growth.
Whether you’re looking for the best custom company signage, logo signs, office directories, safety signs or any other interior elements that support your business activities and brand, our design team is ready to create solutions that will be effective in supporting the success of your company.
A well-designed branding sign can set you apart from the competition, ensure your branding is consistent and that potential customers know exactly what your business is about. Our experts are familiar with the latest trends and styles to help you design a sign that will capture the attention of your target audience.
Most local sign-making companies charge a fee for designing your sign project, but we provide our clients with a full catalog of products and services so that they can have one vendor to assist them through the entire process. This will result in a shorter lead time for your project. Additionally, most projects will require an engineering review of the schematics by a licensed engineer. This will also typically add to the overall cost of your sign project.
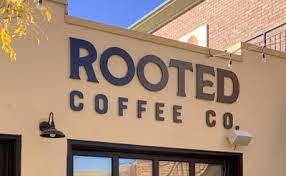
When it comes to branding your business, your signage is a major component. Whether it’s an eye-catching storefront sign to draw in new customers or promotional a-frame signs to interest them in your products, the right signage will communicate your colors, styles, messaging and unique brand personality.
The team at Fort Worth Signs & Graphics is committed to ensuring that you get the impactful, quality signage your business needs to succeed. We offer a full range of services, including design and production as well as installation. Moreover, we have a large inventory of equipment and are certified to work with multiple government agencies.
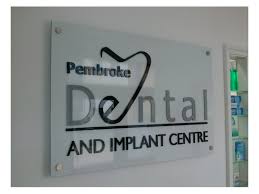
Invest once in impressive indoor and outdoor signage that will provide unlimited impressions for years to come. Outfit your office, showroom, or retail space with custom-fabricated acrylic signs that are versatile enough for a variety of uses. These will enhance your branding, improve customer and employee experiences, and escalate your sales. Moreover, they are also durable and can withstand weather elements.
Signs that are attractive and well-made help businesses attract new customers and increase their brand awareness. Whether they are eye-catching storefront signs, promotional a-frames, wayfinding signs or safety signs, the overall success of these visual communications assets depends on how effectively they are designed, fabricated and installed.
A professional who specializes in sign installation helps take the finished product from the printer to the side of a building or billboard. They know how to safely transport the large signs and mount them on their appropriate surface, and they also can repair signs that are damaged during transportation or by environmental factors.
Because this is a physically demanding job, it is helpful for sign technicians to have strong hands and good balance. They may be asked to work on ladders or in crane buckets, so they need to have the necessary skills and equipment to complete their assigned tasks safely. They also need to be detail-oriented and able to spot slight misalignments or color discrepancies in the final sign.
When selecting a sign company, it’s important to find out what their process is like from start to finish. They should be eager to answer all of your questions with a full understanding and not just generalities. You will also want to see examples of their work before signing a contract with them. If they can’t provide you with any examples of their work, that should be a red flag and you should keep looking.
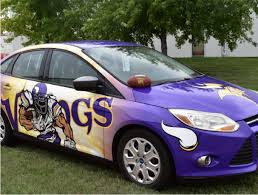
We are a full-service sign shop, which means we can assist with the design and layout, fabrication, as well as the attractive installation of your new signage. This allows you to avoid having to utilize multiple different sign makers, and provides a consistent look across your entire property or business. Whether you need a dignified monument sign to bring in tenants or a modern LED or digital sign to attract new customers, we can help. We can even create a full commercial vehicle wrap and graphic collection for you to increase your brand’s visibility in the field and on the go!
 nes safe. So if your roof needs repair or replacement, you want to make sure the job is done right the first time so that it doesn’t cost you more in the long run with costly leaks and damage.
 Outdoor signage plays a key role in establishing brand awareness, telling potential customers about your business and the products or services you provide. That’s why it’s so important to choose the right signage for your Austin or surrounding area business.
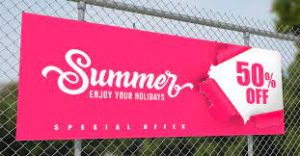
 Vinyl Signs are a cost-effective, versatile means of advertising. They are a popular choice for store openings, large seasonal events and trade shows.